Introduction
System Environment
Operating System Preparations
JDK / JRE
Apache Ant and Ivy
Maven
Git
Environemnt variables
IDE: Visual Studio Code
Java project in Visual Studio Code
Jetty 10 (standalone) Setup
Basic Servlet with Jetty 10 and Maven
Spring Boot (web application example)
This is a quick reference of how to establish a Java technology development environment on a Debian based Linux environment in general, and particularly focussed on Raspberry Pi OS, where system resources need to be used sustainably.
The page is thought to be for myself, for later re-use, however I don't see any reason for not publishing it, since it can be helpful for other developers too. For many subjects there are other solutions or alternative ways to go. I don't discuss them here, I just write down my personal preference.
I see myself as the collector of the contained solutions, not as the "author" or "inventor", a lot of contents is from other sources, which I cannot all mention or cite here, as I need to concentrate on my developer work, of which this page is a "side product".
RaspberryPi 4, 4 GB memory, Raspberry Pi OS (Debian 10 buster), 64bit (aarch64)
as a sudo user e.g. pi (or root): add a user (which is the developer):
      sudo adduser jade
      Lege Benutzer »jade« an ...
      Lege neue Gruppe »jade« (1002) an ...
      Lege neuen Benutzer »jade« (1002) mit Gruppe »jade« an ...
      Erstelle Home-Verzeichnis »/home/jade« ...
      Kopiere Dateien aus »/etc/skel« ...
      Geben Sie ein neues Passwort ein:
      Geben Sie das neue Passwort erneut ein:
      passwd: Passwort erfolgreich geändert
      Benutzerinformationen für jade werden geändert.
      Geben Sie einen neuen Wert an oder drücken Sie ENTER für den Standardwert
              Vollständiger Name []: Java Developer
	           Zimmernummer []:
	           Telefon geschäftlich []:
	           Telefon privat []:
	           Sonstiges []:
      Sind die Informationen korrekt? [J/n] J
The account is now ready for use, but needs to be added to the sudoers group:
sudo visudo
add the following line at the end of the edited file:
jade ALL=(ALL) NOPASSWD: ALL
From now on everything every example command on this page is done by this user, unless explicitly mentioned.
If superuser privileges are required, the command is running in sudo context.
Download:
https://adoptopenjdk.net/releases.html?variant=openjdk11&jvmVariant=hotspot
- OpenJDK 8 (LTS)
- OpenJDK 11 (LTS)
- corresponding JREs (if needed)
- Operating System: Linux
- Architecture: aarch64
Install:
         cd /usr/local
         sudo mkdir java
         cd java
         sudo cp /path/to/downloaded/jdk_and_jre/OpenJDK8U-jdk_aarch64_linux_hotspot_8u302b08.tar.gz .
         sudo cp /path/to/downloaded/jdk_and_jre/OpenJDK11U-jdk_aarch64_linux_hotspot_11.0.12_7.tar.gz .
         ... same with JRE packages if needed ...

         sudo tar -xzf ./OpenJDK8U-jdk_aarch64_linux_hotspot_8u302b08.tar.gz
         sudo tar -xzf ./OpenJDK11U-jdk_aarch64_linux_hotspot_11.0.12_7.tar.gz
         ... same with JRE packages if needed ...

         sudo rm ./*.tar.gz

         ... set environment variables ... see Environment Variables
Download Ant: https://ant.apache.org/bindownload.cgi
Download Ivy: http://ant.apache.org/ivy/download.cgi
- select Ivy "with dependencies" download package
Install:
      cd /usr/local

      sudo cp /path/to/downloaded/ant_package/apache-ant-1.10.11-bin.tar.gz .
      sudo cp /path/to/downloaded/ivy_package/apache-ivy-2.5.0-bin-with-deps.tar.gz .

      sudo tar -xzf ./apache-ant-1.10.11-bin.tar.gz
      sudo tar -xzf ./apache-ivy-2.5.0-bin-with-deps.tar.gz

      sudo mv apache-ant-1.10.11 ant
      sudo mv apache-ivy-2.5.0 ivy

      sudo rm ./*.tar.gz

      sudo cp ./ivy/ivy-2.5.0.jar ./ant/lib

      ... set environment variables ... see Environment Variables
Test the installation:
      cd
      mkdir project/ant_ivy_test
      cd project/ant_ivy_test
vi build.xml (new file)
      ant

      Buildfile: /home/user/project/ant_ivy_test/build.xml

      test:

      BUILD SUCCESSFUL
      Total time: 1 second
Download:
https://maven.apache.org/download.cgi
Install:
      cd /usr/local

      sudo cp /path/to/downloaded/maven_package/apache-maven-3.8.1-bin.tar.gz .

      sudo tar -xzf ./apache-maven-3.8.1-bin.tar.gz

      sudo mv apache-maven-3.8.1 maven

      sudo rm ./*.tar.gz

      ... set environment variables ... see Environment Variables
Install:
sudo apt install git
Configure:
         git config --global user.name "Java Developer"
         git config --global user.email "jade@devel.somedomain.com"
         git config --global push.default simple
         git config --global branch.autosetuprebase always
         git config --global core.editor nano
         git config --global diff.tool vimdiff
         git config --global merge.tool vimdiff
         - alternatively for diff.tool and merge.tool (requires graphic desktop):
            git config --global diff.tool meld
            git config --global merge.tool meld
         git config --global color.ui true
         git config --global color.status auto
         git config --global color.branch auto

         check configuration
            git config --list

         documentation
            git help
            git help -a
            git help -g

         browser:https://git-scm.com

         version
            git --version
Create a repository:
         cd projects
         mkdir sampleproject
         cd sampleproject

         vi readme.txt
         --------------
         This is a sample Java project to be source controlled by Git.
         --------------

         vi .gitignore
         --------------
         *.[oa]
         ./target
         *.class
         *.log
         --------------

         git init
         >> Leeres Git-Repository in /home/stephan/project/sampleproject/.git/ initialisiert

         git add readme.txt
         git add .gitignore
         git commit -m "project initialized"

         cd .. (change to the projects folder)

         git clone --bare sampleproject sampleproject.git
         >> Klone in Bare-Repository 'sampleproject.git' ... Fertig.
Locate the repository on a server for cooperative work:
         scp -r sampleproject.git jade@reposerver:/gitrepo
         ssh jade@reposerver
         cd /gitrepo/sampleproject.git
         git init --bare --shared
         >> Reinitialized existing shared Git repository in /gitrepo/sampleproject.git/
- now every user in the same group / on the same (Unix) machine is able to use the repository.
         cd path/to/projects
         git clone jade@reposerver:/gitrepo/sampleproject
      sudo vi /etc/envvar.sh (new file)
      - - -
      export JDK8_HOME="/usr/local/java/jdk8u302-b08"
      export JDK8_PATH="/usr/local/java/jdk8u302-b08/bin"
      export JRE8_HOME="/usr/local/java/jdk8u292-b10-jre"
      export JRE8_PATH="/usr/local/java/jdk8u292-b10-jre/bin"
      export JDK11_HOME="/usr/local/java/jdk-11.0.12+7"
      export JDK11_PATH="/usr/local/java/jdk-11.0.12+7/bin"
      export JRE11_HOME="/usr/local/java/jdk-11.0.11+9-jre"
      export JRE11_PATH="/usr/local/java/jdk-11.0.11+9-jre/bin"
      export JAVA_HOME=$JDK11_HOME
      export JAVA_PATH="$JDK11_PATH:$JRE11_PATH"
      export ANT_HOME="/usr/local/ant"
      export ANT_PATH=$ANT_HOME/bin
      export MVN_HOME="/usr/local/maven"
      export MVN_PATH=$MVN_HOME/bin
      - - -

      sudo vi /etc/profile
      - - -
      # /etc/profile: system-wide .profile file for the Bourne shell (sh(1))
      # and Bourne compatible shells (bash(1), ksh(1), ash(1), ...).

      . /etc/envvar.sh

      if [ "`id -u`" -eq 0 ]; then
         PATH="/usr/local/sbin:/usr/local/bin:/usr/sbin:/usr/bin:/sbin:/bin"
      else
         PATH="/usr/local/sbin:/usr/local/bin:/usr/sbin:/usr/bin:/sbin:/bin:/usr/local/games:/usr/games"
      fi
      export PATH

      export PATH=$PATH:$JAVA_PATH:$ANT_PATH:$MVN_PATH
      . . .
      - - -
add the two bold lines to the existing /etc/profile.Install:
      sudo apt install code
      sudo apt upgrade code
Create a workspace: File > Add folder to workspace
File > Save workspace as ... - e.g. [same name as project folder].code-workspace in project folder
Add Extensions:
Ctrl-Shift-P : Command Line for Extensions
Java settings: Settings > Extensions > Java
edit java.configuration.runtimes and java.home
in settings.json
            "java.home": "/usr/local/java/jdk-11.0.12+7",
            "java.configuration.runtimes": [
               {
                  "name": "JavaSE-1.8",
                  "path": "/usr/local/java/jdk8u302-b08"
               },
               {
                  "name": "JavaSE-11",
                  "path": "/usr/local/java/jdk-11.0.12+7",
                  "default": true
               },
            ],
VSC uses the JDK/runtime where java.home is pointing to and where default=true,
so settings must be changed both if a different JDK is to be used.
Additionally, VSC is still sensitive towards the operating system environment,
variables, so in order to change the JDK and JRE used in VSC, it ist necessary
to also change the respective environemnt variables.
VSC
The following section describes the initial generating of a new Java project using maven archetype.
Since there are obviously no up-to-date archetypes, matching Java 11 or later, available,
some refactoring needs do be done after generation. So it might be useful to keep the simple project,
once it works, as a prototype for later projects, rather than using archetype generation again.
- Ctrl-Shift-P
- Create a Java Project
- Maven create from Archetype
- archetype-quickstart-JDK8
=> this will create a basic Java project structure still suitable for JDK later than 8, however the generated pom.xml needs to be replaced.
- select a version: 2.0.0 (archetype version)
- Group ID: for example de.redeight
- Artifact ID: for example vsc_java
- Destination folder: for example /home/jade/projects (will create project folder vsc_java underneath /home/jade/projects )
executing task: mvn org.apache.maven.plugins:maven-archetype-plugin:3.1.2:generate
-DarchetypeArtifactId="archetype-quickstart-jdk8"
-DarchetypeGroupId="com.github.ngeor"
-DarchetypeVersion="2.0.0"
-DgroupId="de.redeight"
-DartifactId="vsc_java"
- Interactions:
Define value for property 'version' 1.0-SNAPSHOT: 0.1 (example)
Package: de.redeight : Y
[INFO] ----------------------------------------------------------------------------
[INFO] Using following parameters for creating project from Archetype: archetype-quickstart-jdk8:2.0.0
[INFO] ----------------------------------------------------------------------------
[INFO] Parameter: groupId, Value: de.redeight
[INFO] Parameter: artifactId, Value: vsc_java
[INFO] Parameter: version, Value: 0.1
[INFO] Parameter: package, Value: de.redeight
[INFO] Parameter: packageInPathFormat, Value: de/redeight
[INFO] Parameter: package, Value: de.redeight
[INFO] Parameter: groupId, Value: de.redeight
[INFO] Parameter: artifactId, Value: vsc_java
[INFO] Parameter: version, Value: 0.1
[INFO] Project created from Archetype in dir: /home/jade/projects/vsc_java
[INFO] ------------------------------------------------------------------------
[INFO] BUILD SUCCESS
[INFO] ------------------------------------------------------------------------
[INFO] Total time: 49.867 s
[INFO] Finished at: 2021-09-20T14:24:13+02:00
[INFO] ------------------------------------------------------------------------
Das Terminal wird von Aufgaben wiederverwendet, drücken Sie zum Schließen eine beliebige Taste.
- File > Add folder to Workspace ... => /home/jade/projects/vsc_java
- File > Save Workspace as ... => /home/jade/projects/vsc_java/vsc_java.code-workspace
The generated project file structure looks like this:
         vsc_java/
         |-- pom.xml
         |-- src
         |   |-- main
         |   |   `-- java
         |   |       `-- de
         |   |           `-- redeight
         |   |               `-- AppSample.java
         |   `-- test
         |       `-- java
         |           `-- de
         |               `-- redeight
         |                   `-- AppSampleTest.java
         |-- target
         |   |-- classes
         |   |   `-- de
         |   |       `-- redeight
         |   |           `-- AppSample.class
         |   |-- test-classes
         |   |   `-- de
         |   |       `-- redeight
         |   |           `-- AppSampleTest.class
         |   `-- vsc_java-0.1.jar
         `-- vsc_java.code-workspace
- Replace the generated pom.xml to
- Download Jetty 10 from here: http://www.eclipse.org/jetty/download.php
Install:
su (root)
cd /opt
cp /path/to/jetty-home-10.0.6.tar.gz .
tar -xzf jetty-home-10.0.6.tar.gz
rm ./jetty-home-10.0.6.tar.gz
mv jetty-home-10.0.6/ jetty
mkdir jetty_base
vi /etc/envvar.sh
- - -
...
export JETTY_HOME="/opt/jetty"
export JETTY_BASE="/opt/jetty_base"
- - -
- Add required modules:
cd /opt/jetty_base/
java -jar $JETTY_HOME/start.jar --add-module=server,http,deploy
- to check installed modules:
java -jar $JETTY_HOME/start.jar --list-modules=*
...
The Jetty Base structure looks now like this:
         jetty_base
         |-- resources
         |   `-- jetty-logging.properties
         |-- start.d
         |   |-- deploy.ini
         |   |-- http.ini
         |   `-- server.ini
         `-- webapps
In /opt/jetty_base/start.de/http.ini change jetty.http.port to (for example) 1080 to (later on) distinguish this to other Jetty instances.
- Create the file system structure:
      cd /home/jade/projects
      mkdir basicservlet
      cd basicservlet
      mkdir -p src/main/java/de/redeight
      mkdir -p src/main/webapp/WEB-INF
      touch src/main/java/de/redeight/BasicServlet.java
      touch src/main/webapp/WEB-INF/web.xml
      touch ./pom.xml
- the resulting file system structure:
      basicservlet/
      |-- pom.xml
      `-- src
          `-- main
              |-- java
              |   `-- de
              |       `-- redeight
              |           `-- BasicServlet.java
              `-- webapp
                  `-- WEB-INF
                      `-- web.xml
- BasicServlet.java:
VSC
install Spring Boot Extension Pack
Ctrl-Shift-P
Spring Initializr: Create a Maven Project ...
- Spring Boot Version: 2.5.4
- Language: Java
- Input Group: de.redeight
- Input Artifact ID: sbwebsample
- Packaging Type: jar
- Java Version: 11
- Dependencies:
- Spring Boot DevTools
- Spring Web
- no further dependencies for now
- selected 2 dependencies > press ENTER to continue
- Dialog: Folder: ~/project ( select the (parent) project folder )
- - quit Dialog using [Generate to this folder]
- "successfully generated". Location: ~./project ==> [Open]
- [Add to Workspace]
- File > Save workspace as ... ~/project/sbwebsample/sbwebsample.code-workspace
- ... generating Java project(s) ...
- ... importing Java project(s) ... (VSC might prompt for this)
Generated project:
            sbwebsample
            |-- HELP.md
            |-- mvnw
            |-- mvnw.cmd
            |-- pom.xml
            |-- sbwebsample.code-workspace
            |-- src
            |   |-- main
            |   |   |-- java
            |   |   |   `-- de
            |   |   |       `-- redeight
            |   |   |           `-- sbwebsample
            |   |   |               `-- SbwebsampleApplication.java
            |   |   `-- resources
            |   |       |-- application.properties
            |   |       |-- static
            |   |       `-- templates
            |   `-- test
            |       `-- java
            |           `-- de
            |               `-- redeight
            |                   `-- sbwebsample
            |                       `-- SbwebsampleApplicationTests.java
            `-- target
                |-- classes
                |   |-- application.properties
                |   `-- de
                |       `-- redeight
                |           `-- sbwebsample
                |               `-- SbwebsampleApplication.class
                `-- test-classes
                    `-- de
                        `-- redeight
                            `-- sbwebsample
                                `-- SbwebsampleApplicationTests.class
- Add more dependencies (if needed) - Spring Initializr: Add Starters...
            public class Intro {

               private final long id;
               private final String content;

               public Intro(long id, String content) {
                  this.id = id;
                  this.content = content;
               }

               public long getId() {
                  return id;
               }

               public String getContent() {
                  return content;
               }
            }
- Intro is a POJO class. Additionally a RestController class is needed
            package de.redeight.sbwebsample;

            import java.util.concurrent.atomic.AtomicLong;

            import org.springframework.web.bind.annotation.GetMapping;
            import org.springframework.web.bind.annotation.RequestParam;
            import org.springframework.web.bind.annotation.RestController;

            @RestController
            public class IntroController {
               private static final String template = "Hello, %s!";
	            private final AtomicLong counter = new AtomicLong();

               @GetMapping("/intro")
	            public Intro intro(@RequestParam(value = "name", defaultValue = "World") String name)
               {
                  return new Intro(counter.incrementAndGet(), String.format(template, name));
               }
            }
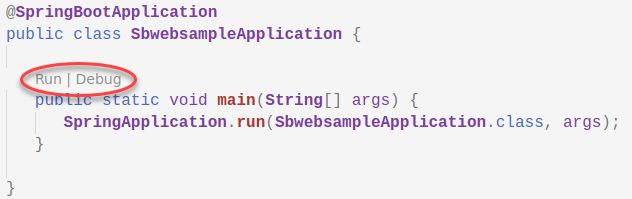
- build and run the service (from VSC): use the Run code lense function at the main method: